SFP (small form factor pluggable) transceiver is now ubiquitous in Gigabit Ethernet networks. It serves as a hot-pluggable I/O devices that being inserted into module sockets to create 1 Gigabit transmission. SFP transceiver is generally used for applications both in telecommunication and data communication, which can be intermixed with 1000BASE-T, 1000BASE-SX, 1000BASE-LX/LH, 1000BASE-ZX and 1000BASE-BX10-D/U on a port-by-port basis. Fail to install SFP transceiver can cause catastrophic damage to the module and network, hence it is better to grasp some knowledge on the right installation procedures.
Here are some precautions you should be aware of before delivering installation.
- Make sure to disconnect all the cables before installing the SFP transceiver, in case any damage that may be caused to cables, connectors and the optical interfaces.
- Try not to install and remove the SFP transceiver too often since this may shorten its life expectancy.
- Transceiver modules are rather sensitive to static, it is suggested to use an ESD wrist strap or comparable grounding device during the process of installation and removal.
- Never remove the dust plug from the SFP transceiver unless you are ready to put it into use. Similarly, the dust plug on the SFP transceiver is used to protect the optical bore and shall not be removed until you attaching patch cable to it.
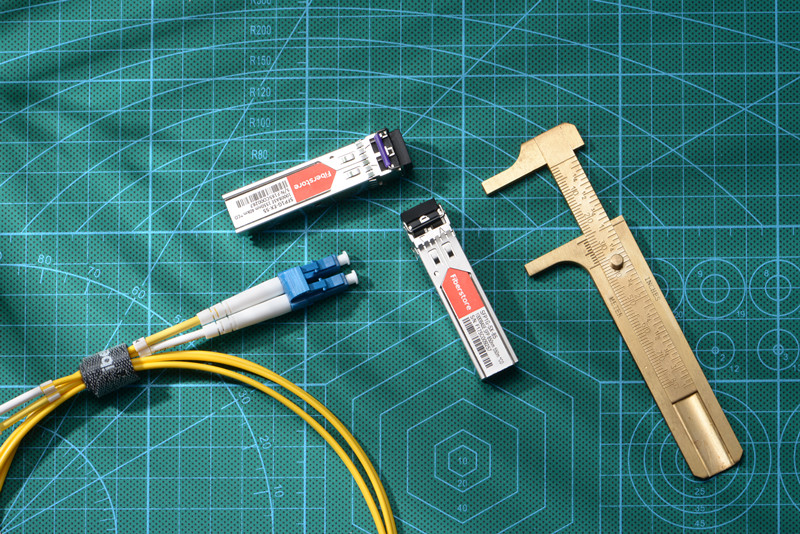
Additionally, some professional tools are also required to complete the installation, including:
- Wrist strap or other personal grounding device to prevent ESD occurrence.
- Antistatic mat or antistatic foam to set the transceiver on.
- Fiber-optic end-face cleaning tools and inspection equipment.
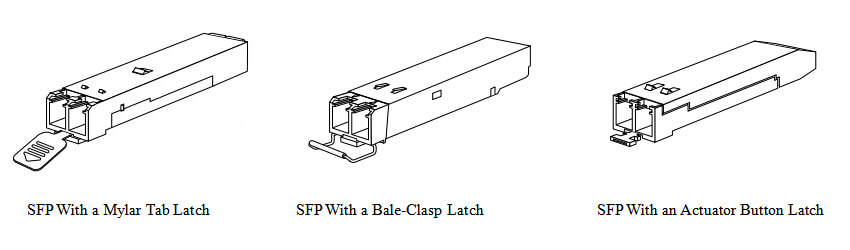
SFP transceiver primarily have three types of latching devices to secure itself in a port socket: a mylar tab latch, a bale-clasp latch and an actuator button latch. With the bale-clasp latch to be the most widely used one. You should be clear which type of latch your SFP transceiver have before install it. Bear the aforementioned precaution in mind, then perform the following steps to complete installing SFP transceiver.
Step 1. Attach an ESD-preventive wrist strap to your wrist and to the ESD ground connector or a bare metal surface on your chassis.
Step 2. Remove the SFP transceiver module from its protective packaging.
Note: Do not remove the optical bore dust plugs until directed to do so later in the procesure.
Step 3. Check the label on the SFP body to verify that you have the correct model for your network.
Step 4. Find the send (TX) and receive (RX) markings that identify the top side of the SFP transceiver.
Note: On some SFP transceivers, the TX and RX marking might be replaced by arrowheads that point from the SFP transceiver connector (transmit direction or TX) and toward the connector (receive direction or RX).
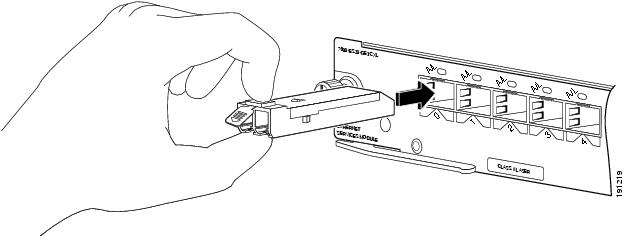
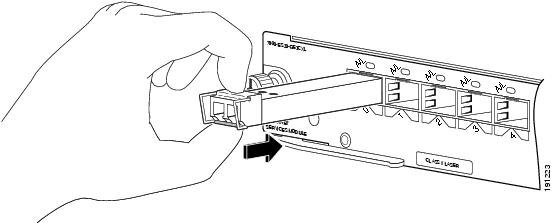
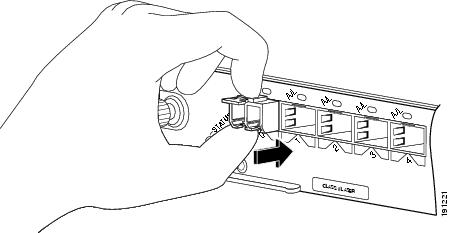
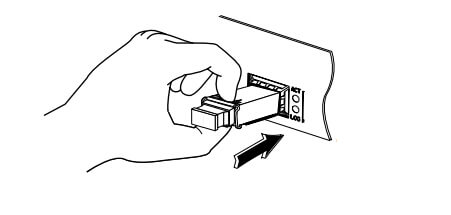
Step 5. Position the SFP transceiver in front of the socket opening.
Note: different devices may have various SFP module socket configurations, either a latch-up or a latch-down orientation. Ensure that you are installing the SFP transceiver in the correct orientation for your device. Refer to the hardware installation instructions that came with your device for mire details.
- For transceiver with a mylar/pull tab.
- For transceivers with a bale-clasp latch.
- For transceivers with an actuator latch.
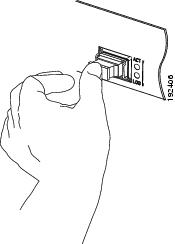
Step 6. Insert the SFP transceiver into the socket until you feel the SFP module connector snap into place in the socket.
Note: For optical SFP transceivers, before you remove the dust plugs and make any optical connections, observe these guidelines:
- Always keep the protective dust plug on the unplugged fiber-optic cable connectors and the transceiver optical bores until you are ready to make a connection.
- Always inspect and clean the LC connector end-faces just before you make any connections.
- Always grasp the LC connector housing to plug or unplug a fiber-optic cable.
Step 7. Press the SFP into the slot firmly with your thumb. You must press firmly on both the transceiver face-plate and the actuator button to ensure that the transceiver is properly latched in the socket.
Step 8. To verify that the SFP is seated and latched properly. Grasp the SFP and try to remove it without releasing the latch. If the SFP can not be removed, it is installed and seated properly. If the it can be removed, reinsert it and press harder with your thumb, repeating if necessary until it is latched securely into the socket.

Step 9. Remove the dust plugs from the LC fiber patch cable and save the dust plugs for future use. Then inspect and clean the patch cable end-face.
Step 10. Remove the dust plugs from the SFP transceiver optical bores. And immediately attach the LC fiber patch cable to the SFP transceiver.
To install a SFP transceiver is a commonplace in data center, yet not as easy as it appears. There are much to consider before you actually perform the action. And you have to get fully prepared with a thorough plan. Hope this step-by-step guide would be informative enough to practice right SFP transceiver installation. FS provides a whole line of optical transceiver products, including SFP, SFP+, QSFP+ and QSFP28 transceiver modules, as well as CWDM and DWDM transceivers. For more details, please visit www.fs.com.
Related Article: Optical Module Maintenance Methods and Installation Tips
Related Article: FS 40G QSFP+ Modules And DAC/AOC Cables Installation Guide